You have strength to bang out a plenitude of push-ups, a bunch of burpees, and planks in perpetuity. But you have one limiting factor: wrist pain. So, it’s your joints — not your muscles — giving out that sends you collapsing in a heap.
Since push-ups and planks are integral to workouts from bootcamps and body-sculpting to yoga and Pilates, skipping them isn’t really an option.
Luckily, you don’t have to. You can perform push-up movements with less pain in a way that protects — rather than strains — your wrists. And you can minimize the triggers that stress them, performing moves that build strength in your wrists.
Why Your Wrist Hurts When Doing Push-Ups
Like any other joint in your body, your wrists are happiest in the Goldilocks zone — when you’re not using them too little or too much, but just right.
Stiffness and inflammation result from two primary causes:
- Misuse. You can hurt your wrists acutely by forcing them into awkward positions during exercise, a fall, or some other mishap.
- Overuse. Pain from repetition, also known as repetitive strain injury (RSI) and carpal tunnel syndrome, can come from spending hours on a computer or mobile device. It can also occur from performing weight-bearing exercises that stress your wrists too frequently.
“There are a variety of reasons for wrist pain, but a common one is from repetitively performing the same motions,” says Dr. Kristin Valdes, OTD, OT, CHT, assistant professor of occupational therapy at Gannon University in Ruskin, Florida.
Here’s why: When you contract the back of your hand toward your forearm, your wrist is in extension. Assuming a push-up position in which your extended wrists support your bodyweight can put pressure on the median nerve in the wrist.
“When you repetitively perform any motion, the tendons that cross the wrist can become inflamed and then press on the median nerve. This pressure can be exacerbated during exercise activities where the wrist is fully extended,” Dr. Valdes says.
So the problem might start with how you use your wrists during your day job, and then your gym work may simply make it worse. But you can troubleshoot both what you do at work and the gym to minimize the strain and prevent the pain.
Tips for Doing a Perfect Push-up or Plank
You needn’t cut out push-ups altogether unless you’ve been instructed to by a physician or the exercises are too painful to perform, advises Shannon Cauley, fitness director of The Houstonian Club in Houston, Texas.
But doing them correctly is key:
- First, make sure you’re performing a push-up or plank in a way that’s biomechanically sound. Start on your hands and knees and place your palms flat on the floor or a mat.
- Make sure your hands are in line with (and slightly wider than) your shoulders—not forward or backward of them. Also, “make sure that your hands are placed firmly on the ground, but without cupping your palms — keep your fingers extended.”
- Distribute your bodyweight equally between your hands and the balls of your feet (or knees if you’re doing a modified push-up) so that you minimize the load on your wrists.
- Keep your head in a neutral position (neither lifted up, nor dropped), and your body straight from head to heels.
- When you move up or down to perform a push-up, keep your core fully engaged, moving your entire body up and down as one unit so as to keep your body weight evenly distributed and not shifting weight disproportionately to your wrists.
- Finally, don’t flare your elbows; keep them close to your body as you lower your chest to within a few inches of the floor.
If you’re unsure of your alignment, speak with a qualified trainer, Cauley suggests. And if, even with a perfectly executed push-up or plank, you still feel discomfort, evaluate how bad it is. If it’s minimal, you may be able to alleviate it with our easy fixes below.
“But if you experience any kind of pain, numbness or tingling, see a physician before performing any kind of exercise,” Cauley cautions.
How to Minimize Wrist Strain When You Work Out
If you’re prone to sore wrists, you’re best off avoiding extreme joint angles, especially when you’re working out and exposing the joint to high compressive forces.
Specifically, you want to avoid excess pressure to the median nerve by maintaining a wrist-neutral posture when doing these types of exercises, Dr. Valdes says.
- Place your hands in a different position. Make fists and support your weight on the flat part of the top of them during push-ups and planks. The key is to keep your wrists straight—that’s what will take the stress off them. This option isn’t comfortable for everyone, which is why you might want to…
- Use props. Perform push-ups using push-ups stands — known also as parallettes — or hex dumbbells instead of placing your hands directly on the floor.
- Use a box, step, yoga block, or weight bench. “Turn your hands out and place them on the sides to create room to hold your wrist in a more neutral position,” recommends Galina Denzel, co-author of Eat Well, Move Well, Live Well. (In weightlifting, a “neutral grip” is when your palms face each other.)
- Bolster your wrists. “Simply roll up a small towel or use another comfortable form of modest elevation,” Denzel says, “and place the heel of your palm on it to lift the back of your hand and help keep your wrists more in line with your forearms.” Wrist wedges can provide similar support.
- Also try to keep your wrists straight during weight-bearing moves. In exercises like the barbell chest press, aim to keep your wrists as straight as possible as you lower and raise the weight above your chest. Allowing the bar to bend your wrists backward will increase the stress on them.
How to Avoid Wrist Pain at Work
Easing strain during exercise is only half the battle. How you use your wrists the other 23 hours of the day is just as — if not more — important.
- Set yourself up at your desk so that your wrists and other joints (neck and back) are better positioned to handle long hours. The Occupational Safety and Health Administration (OSHA) recommends that desk and chair height be coordinated so that your hands, wrists, and forearms are in line and parallel to the floor as you use your keyboard or mouse.
- Make sure to take hand breaks and avoid squeezing the mouse too tightly or banging away at the keyboard too hard, Cauley recommends.
- You can also use a wrist support at the keyboard. This low platform can help elevate the heel of the hand to create a more neutral wrist position as you type.
How to Treat Wrist Pain
Jacked up your wrist? Here’s how you can respond:
- Stop doing whatever caused the problem.
- If your problem is severe, see a doctor. You may have to scale activity way back, reducing as much movement in your wrist joint as possible for up to two weeks (and maybe longer) before resuming light activity.
- A splint — available at any drugstore — can help prevent painful, accidental movements. Your doctor will let you know if you need one.
You can address less severe wrist soreness by making minor adjustments to activities that require wrist movement:
- Switching from a mouse to a trackpad at work.
- Buying an ergonomic keyboard.
Nonsteroidal anti-inflammatory meds (NSAIDS) like Advil can reduce inflammation and pain, but don’t pop them indiscriminately — while they can reduce the severity of symptoms, they won’t cure an injured wrist.
How to Strengthen your Wrists
It’s possible to build strength in your forearms to help you better withstand the stress of wrist-supported moves.
- Ease into heavier loads on your wrists by starting planks and push-ups first on raised surfaces like bars or benches. When you transition to the floor, start in a modified push-up or plank, supporting your weight on your knees. Then build up to a full-body pose supported on the balls of your feet.
- Carry heavy weights — or heavy bags outside of the gym — by your sides (rather than slinging a bag over your shoulder.) These “farmer carry” exercises help strengthen the wrists, Denzel says.
- Hang from a bar for five to 10 seconds and work your way up to longer periods and even pull-ups if you can do them, Denzel suggests.
Stretches for Wrist Pain
The following moves can help relieve pain in your wrists. Use them whenever your wrists feel stiff or sore, or as part of a regular hand- and wrist-care program. Perform each stretch slowly at first, and stop if it makes the pain more acute.
1. Forearm self-massage
- From a sitting position, place your right forearm on a table, palm up.
- With your left hand, massage the tissues along the outside and inside of your forearm, working from your elbow to a point about halfway down your forearm.
- When you find a tender spot, apply gentle pressure, breathe deeply, and attempt to relax the tissues.
- Continue massaging up and down for up to two minutes.
2. Forearm flexor stretch
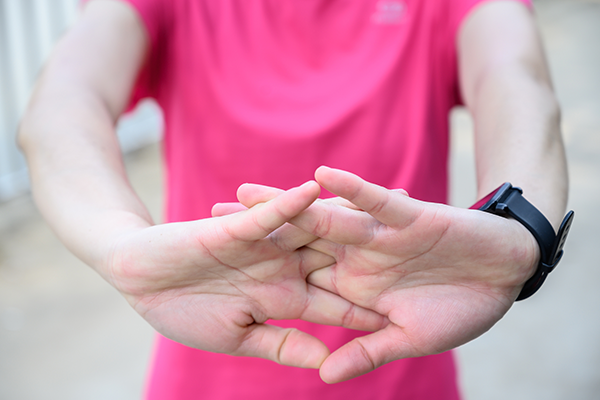
- Interlace your fingers and extend your arms forward, turning your palms away from you.
- Push your palms forward until you feel a stretch in the insides of your forearms, and hold for a two-count.
- Bend your arms slightly, releasing the stretch.
- Continue extending and bending your arms for 30 to 45 seconds.
3. Crossbow
- Interlace your fingers and raise your elbows to chin height, forearms parallel to the floor.
- Keeping your palms down, your fingers interlaced, and your elbows and hands at chin height, slide your palms forward and back as if along a high tabletop, feeling a mild stretch in the sides of your wrists as you do so.
- Repeat for 15 to 25 seconds.
4. Flexion stretch
- Stand behind a table with your hands at your sides and rotate your arms so your palms face backward. You can also do this from a seated position by placing your hands on the floor.
- From this position, place the backs of your hands on the table, shoulder-width apart.
- Straighten your arms as much as possible.
- Apply gentle pressure downwards until you feel a stretch in the backs of your forearms (if this is uncomfortable, place a folded towel on the table).
- Keeping your arms straight, ease in and out of the stretch for 15-25 seconds.
5. Extension stretch
- Place your palms flat on a table, fingers facing you, spread wide, and shoulder-width apart. You can also do this from a seated position with your hands on the floor.
- Straighten — or attempt to straighten — your arms until you feel a stretch in the insides of your forearms.
- Keeping your arms as straight as possible, ease in and out of the stretch for 15 to 25 seconds.
When to See a Doctor
See a doctor for wrist pain if:
- You’ve experienced sudden and severe trauma from a fall or other accident.
- There is noticeable swelling, numbness, or severe pain.
- Pain persists or worsens, even after you stop doing the activities that caused the pain.
- The pain is continuous, even when you’re not using your hand.
- There is swelling, redness, or heat in the wrist, all of which indicate an infection.
