Yoga has a way of making you feel om-azing, thanks to its many benefits. A regular practice boosts confidence, increases strength, and offers mental clarity on dark days.
By working on specific poses or sequences, you get to see how practice leads to progress, giving you the courage to try hard things on and off the mat.
“Yoga can build self-esteem by reminding us of our resilience,” says Joanna Taubeneck, LPC, E-RYT, a licensed professional counselor and yoga instructor.
For example, we learn about falling out of a pose and getting right back into it. This, she says, can help by “physically and mentally grounding us in the present moment, providing us with a boost of empowerment.”
Keep reading to learn more about yoga for self-esteem and which poses are the best at increasing your feelings of self-worth.
Can Yoga Really Boost Self-Esteem?
Yes! Yoga teaches us to slow down and listen to our bodies instead of looking for external validation. The philosophical side teaches us that we already have what we need to be happy — on the inside.
“Yoga philosophy teaches us to undo the ties that keep us in suffering,” says Anthony Chavez, E-RYT 200, a health coach and yoga instructor. “In other words, when it comes to our self-image in confidence, it’s more about remembering that we are already whole and complete.”
The practice can impact posture, flexibility, and strength. Better posture delivers more confidence in everyday life, as seen in this 2009 study.
Plus, says Chavez, yoga postures help with self-acceptance, since they require an up close and personal look at ourselves. A 2018 study found that certain standing yoga poses boosted self-esteem by making practitioners feel more “energetic, empowered, and in control.”
Taubeneck says we have the mind-body connection to thank.
“That means that when our bodies are experiencing confidence, our brains will receive that message, which will, in turn, initiate the development of new neuropathways in the brain, guiding us towards greater mental/emotional confidence,” she explains.
Here are seven powerful poses to include in your yoga for self-esteem routine. Hold each one for at least five breaths or up to one minute. Make sure to properly warm up with sun salutations before you move beyond the first pose.
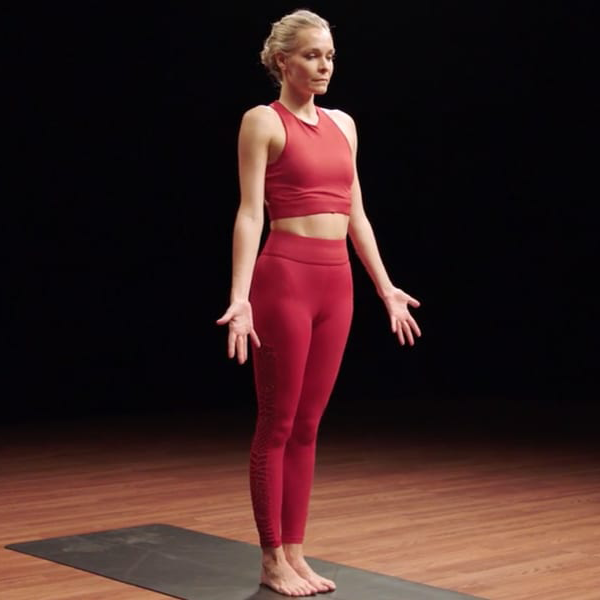
1. Mountain Pose (Tadasana)
- Stand with your feet hip-distance apart or big toes together. Keep your hips facing forward. Make sure your chest is open and pull your shoulders away from your ears.
- Gaze forward. Tuck your chin slightly toward your chest to lift and lengthen through the crown of the head.
- Pull in your navel to engage your core muscles. Stand a little taller.
- Rest your arms by your sides.
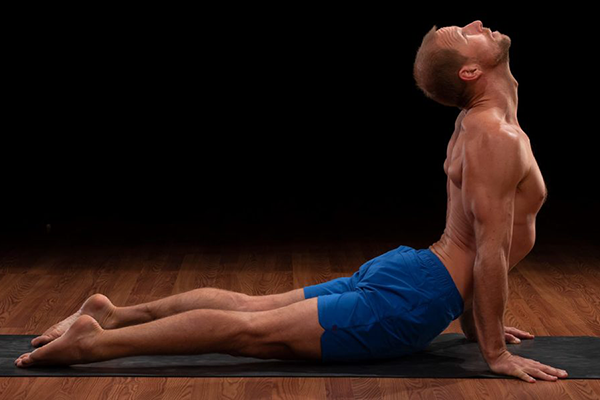
2. Upward Facing Dog (Urdhva Mukha Svanasana)
- Starting in plank, slowly lower down through chaturanga to the floor. Untuck your toes so the tops of the feet are on the mat.
- Place your hands under your shoulders. Keep your legs straight, and press the tops of your feet into the mat.
- On an inhale, press into your palms, straighten your arms, and lift your chest up. Keep your legs straight and press into the tops of your feet, lifting the kneecaps and thighs up from the floor.
- Keep your shoulders directly over your wrists. Open your chest and press your shoulder blades down the back to lift the chest higher. Look straight ahead, then move into downward facing dog.
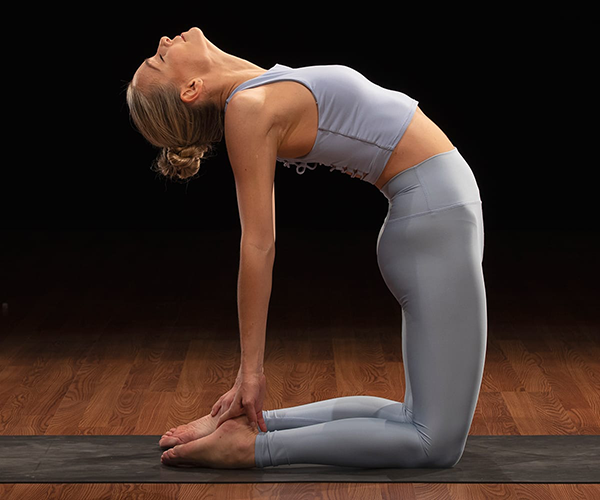
3. Camel Pose (Ustrasana)
- Start in a kneeling position, with your knees directly under your hips and the tops of your feet flat against the mat.
- With your chest lifted and core engaged, slightly contract your glutes, push your hips and thighs forward, and reach for your heels.
- If it feels right, let your gaze go up toward the ceiling. You could let your head drop all the way back, taking care to lengthen the cervical spine rather than compress it.
- To return to the starting position, engage your core, and push into your feet and shins to slowly bring yourself forward. Your head should come up last.
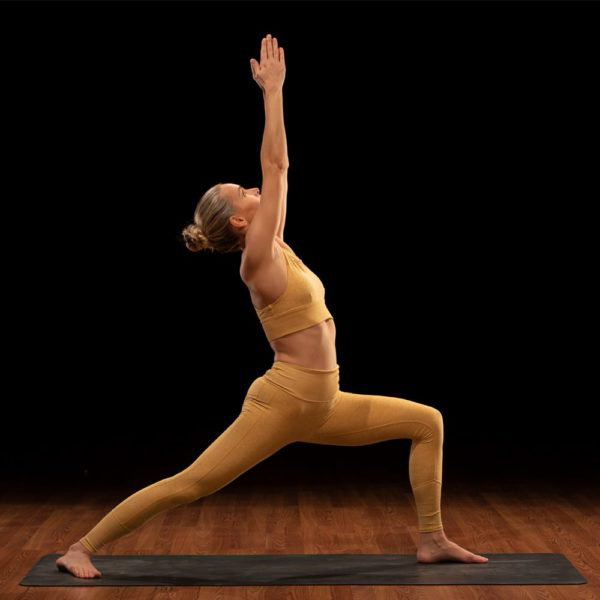
4. Warrior 1 (Virabhadrasana I)
- Start in mountain pose. Step your left foot back three to four feet and place it down at a 45-degree angle.
- Keep your chest and hips facing forward to the front of the mat. Bend your front knee to a 90-degree angle directly over the ankle, with your toes pointing forward. Don’t bend the knee past the ankle.
- Press your back foot into the ground. Lengthen your spine and engage your core. On an inhale, sweep the arms forward and up alongside the ears, palms facing each other.
- Stabilize the legs by pressing the left thigh back and pressing the left heel firmly into the mat. Square your chest and hip to the front of the mat.
- Keep your arms in line with your ears, engage your triceps, and press your shoulders down and away from the ears. Look forward or up toward your hands.
- Repeat on the other side.
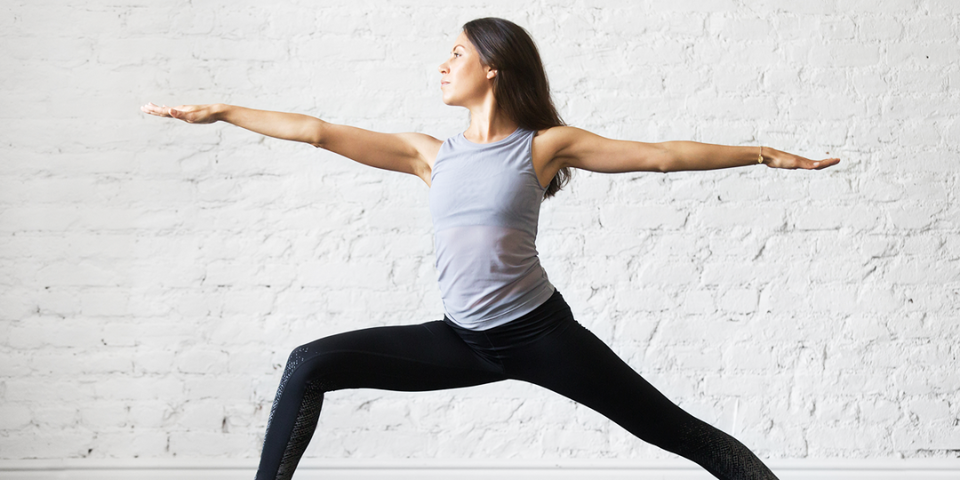
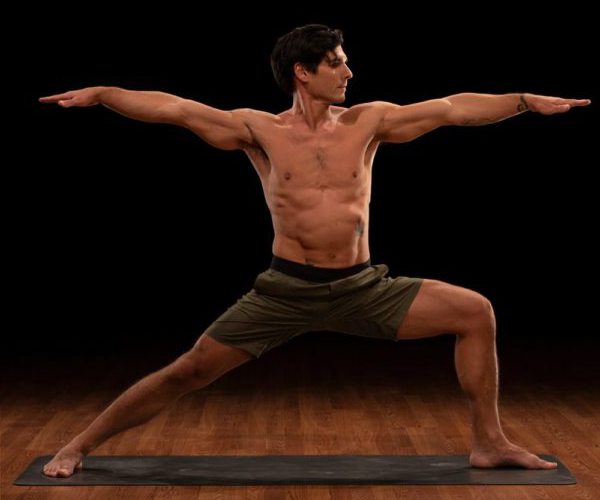
5. Warrior 2 (Virabhadrasana II)
- Start in mountain pose. Step your left foot back three to four feet and place it down at a 45-degree angle, so that your left arch is in line with your right heel.
- Bend your front knee to a 90-degree angle directly over the ankle, with your toes pointing forward. Don’t bend the knee past the ankle. Square your chest and hips to the left side.
- Press your left heel down firmly and engage your left thigh. Stand tall and engage your abs.
- On an inhale, reach your left arm back and your right arm forward, so that they are parallel to the mat in a “T” position with palms facing down.
- Look over your right fingertips. Keep your front knee in line with your second toe. Stack your shoulders directly over your hips. Press your shoulder blades down.
- Repeat on the other side.
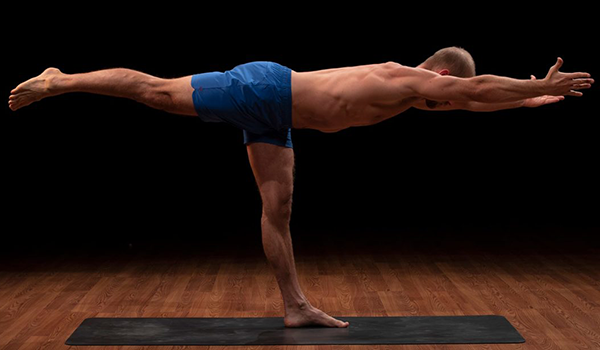
6. Warrior 3 (Virabhadrasana III)
- Stand with your feet hips’ distance apart, with your hands at your sides or together in front of your heart. Engage your abs.
- Shift your weight onto your right foot, and lift your left knee, flexing your left foot.
- Shift your weight forward as you extend your left leg behind you, keeping your left foot flexed. Your upper body and back leg should be parallel with the mat.
- Hold your gaze toward the floor, keeping your head neutral.
- Adjust your hips so that your pelvis is parallel with the floor. Your right leg should be as straight as possible.
- Find your balance, and, if desired, bring your arms straight out in front of you, keeping your shoulders away from your ears.
- On an inhale, reverse the movement to return to mountain pose, and repeat on the other side.
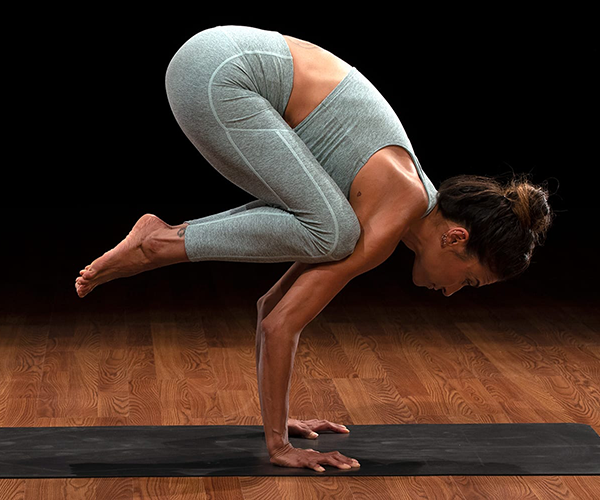
7. Crow Pose (Bakasana)
- Start in malasana (or yogi’s squat). Stand with your feet hip-width apart, and lower your body into a full squat, making room for your chest by spreading your knees. (If you’re unable to bring your feet together, take them wider.)
- Extending your arms between your knees, place your hands on the floor in front of you, elbows bent, and your knees against your triceps. Your hands should be shoulder-width apart, with your fingers spread.
- Come up on to the balls of your feet, and lean forward, keeping your heels as close to your tailbone as possible throughout the pose.
- Keeping your gaze just ahead of your hands, shift your weight forward as you squeeze your legs onto your arms like a clamp, engaging your core and rounding your back.
- Pull your kneecaps as high onto your upper arms as possible before lifting your feet off the floor. Try to keep the inner edges of your feet pressing together.
- Tilt forward, elevating your hips as high as possible. Your pelvis should be higher than your shoulders in the fullest expression of the pose.
- Hold up to one minute, breathing slowly and deeply. Slowly reverse the move to return to the starting position.
Want more yoga for self-esteem? Yoga52 lets you take a deep dive into yoga in your own home and on your schedule.
